In this article, I will take you through how to deactivate facebook account in 3 Easy Steps. As you probably know facebook is one of the leading social media platform where people can connect with their family and friends in digital mode. Friends and family can check the status of their loved ones and can easily communicate with each other using other facebook features like messenger and chat box.
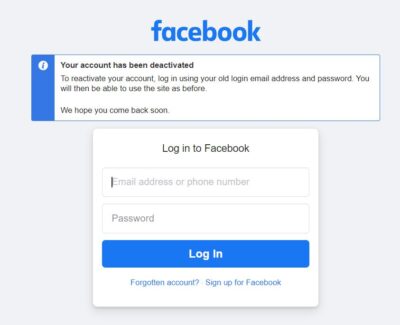
Many times it does happen that due to some reasons you would like to take a break from facebook platform for few days. This can be easily achieved using facebook deactivation feature where you can just deactivate your account and keep it like that. Whenever you feel to return back, you can simply login to your account by using same old email address and password. Here I will show you how you can deactivate facebook account by following just few simple steps.

How to Deactivate Facebook Account in 3 Easy Steps
Also Read: How to Delete Facebook Account in 3 Easy Steps
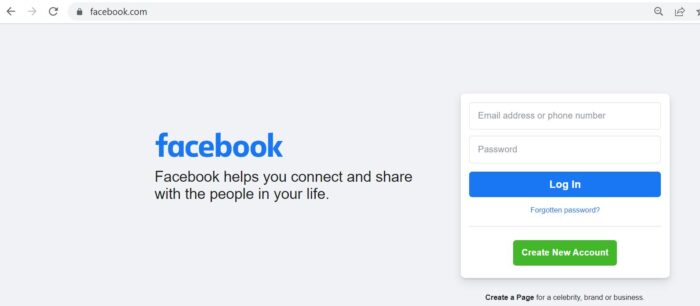
Step 1: Login to Account
You need to first go to facebook Login page as shown below and provide your valid email address or phone number and password to login to your account.
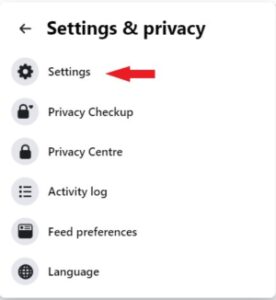
Step 2: Go to Settings
Once logged in, you need to click on profile on top right corner as shown below.

You will see multiple drop down option in which you need to click on Settings & privacy.

Clicking on Settings & Privacy will expand to below options where you need to click on Settings as shown below.
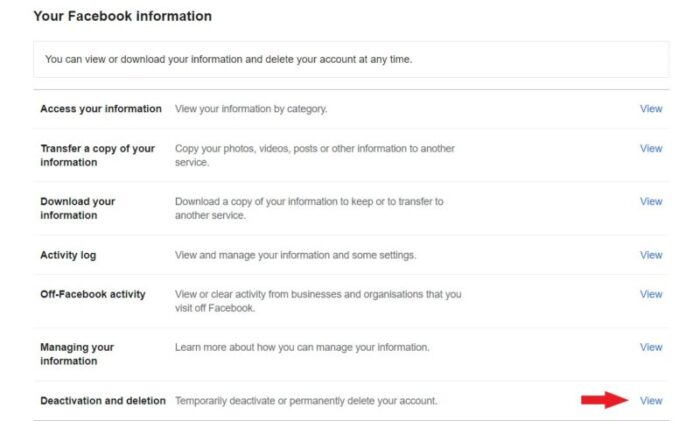
Once the Settings page is opened, you need to click on Your Facebook information showing on the left column.

Step 3: Deactivation Account
Under Your Facebook information, you can view or download all your below information. Here you need to click on view of Deactivation and deletion information as shown below.
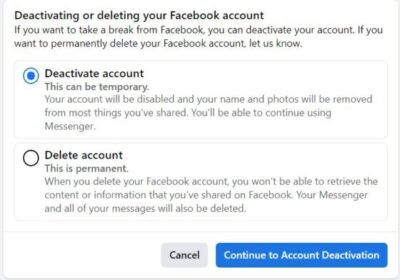
Here you will see two options available - Deactivate account and Delete account. If you are looking to temporary disable your account then you need to choose Deactivate account option and click on Continue to Account Deactivation as shown below.
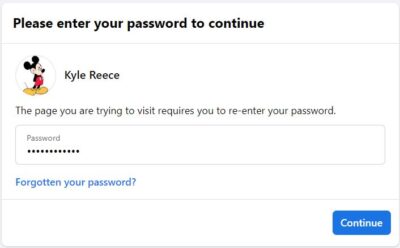
You need to provide your account password to confirm the deactivation. Once given, click on Continue.
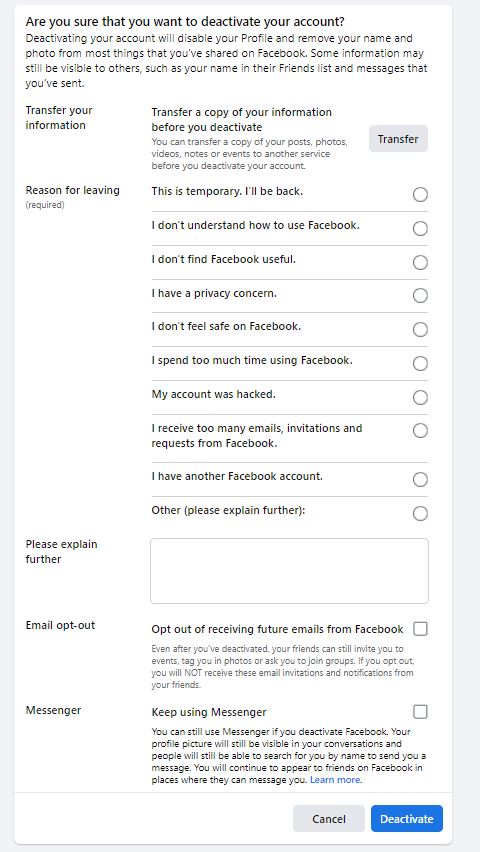
It will ask you to confirm the deactivation by selecting the appropriate reason for leaving. If you want you can also transfer a copy of your information before deactivating the account. Once done click on Deactivate.
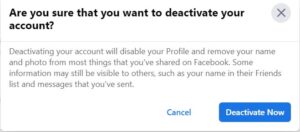
You will see a dialog box like below asking to confirm the deactivation by clicking on Deactivate Now option as shown below.
Once deactivated, it will show you below notification. It says that if you want to reactivate your account in the future then all you need to do is to just login with the same old email address and password. Your account will be restored as usual and you will be able to use it like before.